 Much to the disappointment of at least one Reader, there will be no further mention of ball-banging in this journal, as it appears that the author is, sadly, incapable of said banging.
 Close observation and careful reading on the internet (both of which are considered by experts to be critical auto mechanical skills) have revealed that the task is one best left to professionals, who will apparently not bang, but gently press the ball-joints out of their sockets in the torsion arms, at a cost of $35 per socket (or ball-joint, depending on your point of view).

 To this end, yesterday I called Austin VeeDub--the local VW scrapyard/spare parts/machine shop--and they do this all the time, so instead of ordering the ball-joints online and trying to put them in myself, I'll just pay for the service and the parts and let them do it all in one go. I'll just take in the old and come back for the new.
 Pulling all these parts off has been relatively easy till now. This is the first thing that I simply can't do here in the driveway. There will be other things, like having the rotors turned and polished. I had to pull them off first, of course, before I could get to the ball joints and torsion arms, and they look a bit worse than they really are. They are a bit rough and have a bit of rust around the edges and on the back, but that can be machined/cleaned off with relative ease.
 The piece I was after was a bushing. This bit of plastic (formerly rubber) is what keeps the torsion arm from scraping against the front beam tube, and it is the most difficult and 'deepest' part I will have to replace before I can begin to rebuild. Or so I thought. Pulling off the lower torsion arms I discovered that the spring steel torsion 'leaves' that are inside the front beam tubes were rusted and broken. Somehow water had made it's way into the tube and reduced the grease inside to a useless gray cream. Rust and torque did the rest. I pulled out the whole set of torsion leaves and threw away the broken ones. The call to Austin VeeDub also revealed that they had sets of these leaves in the used parts department. All I have to do is come down and find a set that fits. Interestingly, when I called Austin VeeDub, the used parts manager is the same guy that was working there back when I rebuilt my other two VW's! I don't know if he'll remember me, but I sure remember him. he helped me solve more problems than anyone besides John Muir (cf. How to Keep Your Volkswagen Alive).
After pulling apart the front beam as much as possible without actually pulling it off the frame (no need to do that yet, as I'd just have to store it somewhere) it was time to remove the steering box. I hadn't planned on this, but discovered that after the power washing I had gotten some water in the box and it was beginning to get stiff. So, I pulled it off and as I turned it over, the remainder of the oil in the case poured out all over my leg. Three days and three showers later, I think the smell is gone, whew!

 Next it was time to pull off the engine. This is necessary at this point only to restore some balance to the frame now sitting up on jack stands. After pulling off all the front heavy metal, the whole thing was beginning to get back heavy, which meant I could tip it up with barely a finger. One more part off and the it would just sit up on it's butt. Richard suggested putting some rocks on the front end to hold it down, but I opted to pull the engine instead.
 Pulling the engine is not a difficult job when the body is on the car, but with it off, it's amazingly easy. There are just four bolts holding it to the transmission case, and I had these out in just a couple of minutes. I bought a cheap little dolly at the tool store and put it under the engine along with a couple of scissor jacks. Then when the bolts were out, I just lowered it down and set in on the little dolly and voila! Now I have the engine off but I don't have to move it very far, which is nice. I just leave it under the trap like before.
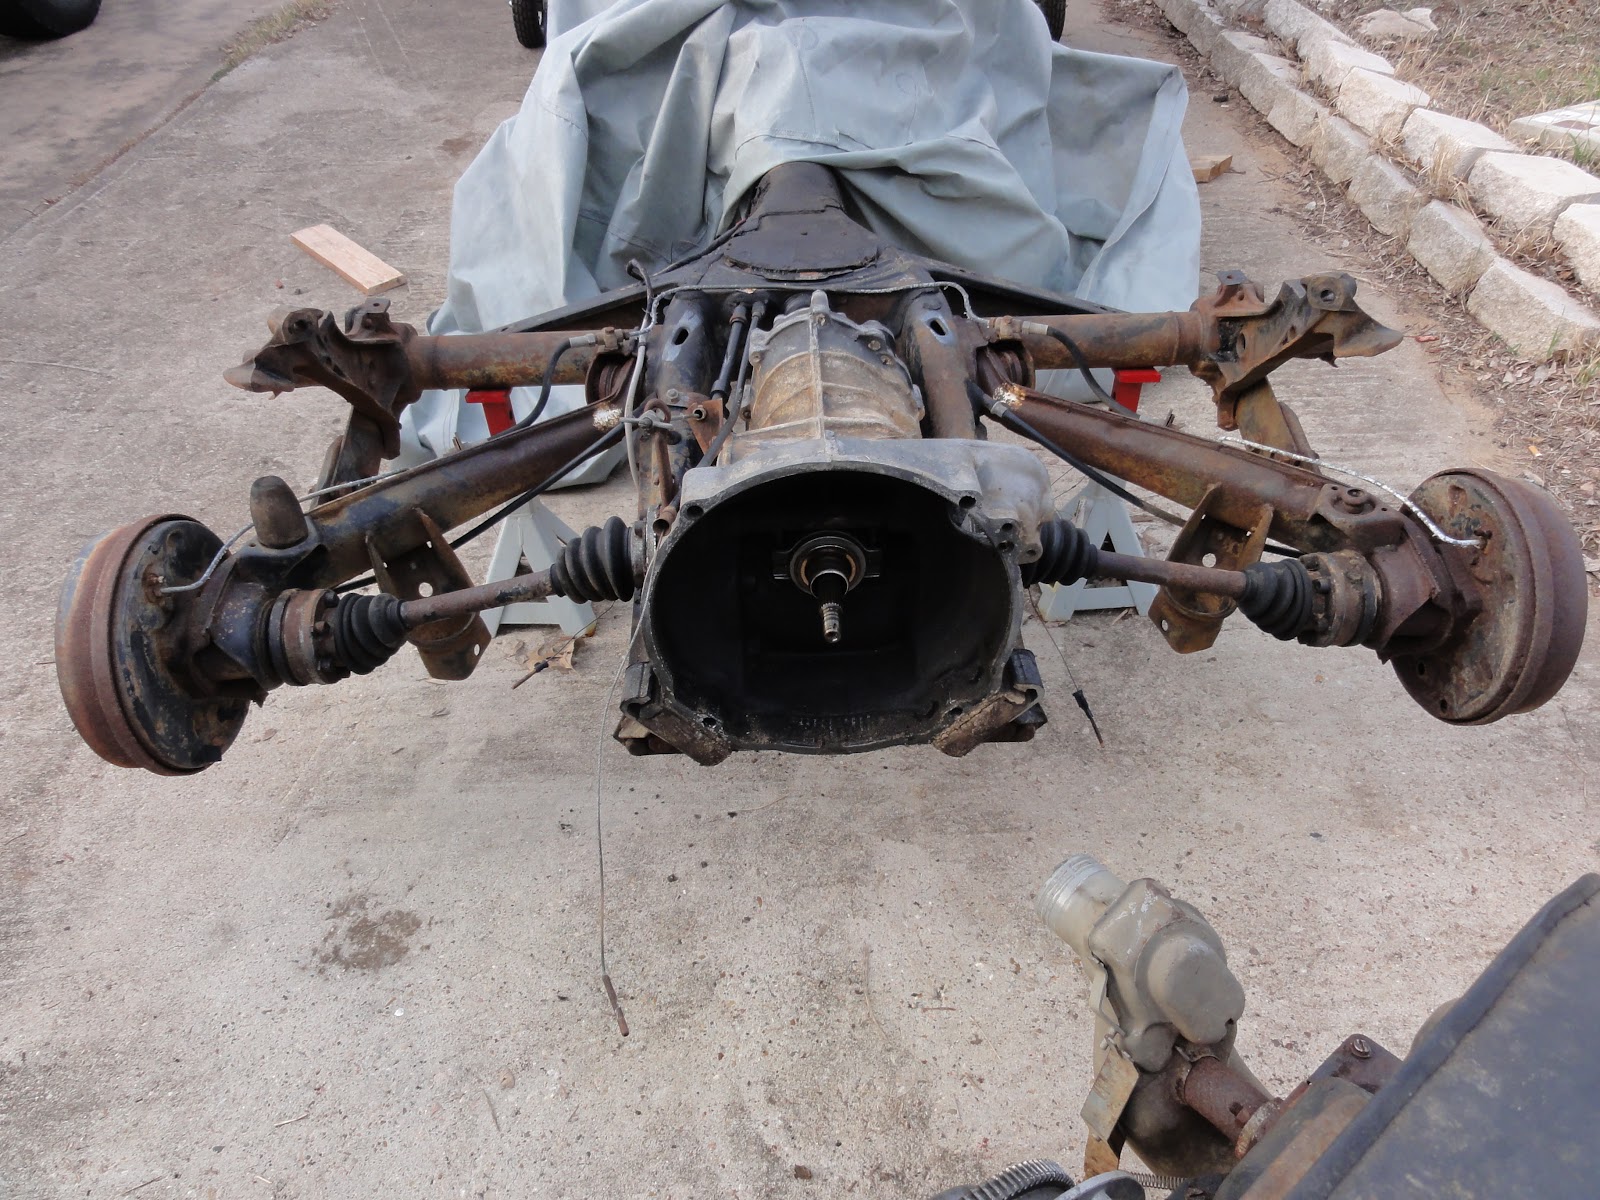

It looks like the clutch is is good shape, which reinforces my belief that this car didn't get driven very much after the rebuilt engine was put in. Closer inspection of the transmission though, makes me think it was the original on the car, and a likely candidate for replacement. Leaks from the seals around the driveshafts are good indicators that it's time to replace rather than refurbish this part. After all, it's way too complicated and just cheap enough that I don't have to bother.

Next up: After transmission removal, the rebuild begins with the front beam.