 |
| Finally it's time to rebuild... |
 |
| ...all the pretty parts are lined up |
This was one of the most anticipated and delicious moments of this whole process so far. I have thus far managed to keep up the momentum in this project by segmenting it, thinking only of the next two or three things that I am going to do on the car. This not only helps me keep focussed on the practical tasks that will move the car forward, but it keeps me from getting daunted by the enormity of the the entire undertaking.
There are, however, parts of the process that I anticipate and envision long before they are possible, and this helps to keep me dreaming about the finished project. One of these parts was the front end, which I successfully rebuilt this past weekend.
 |
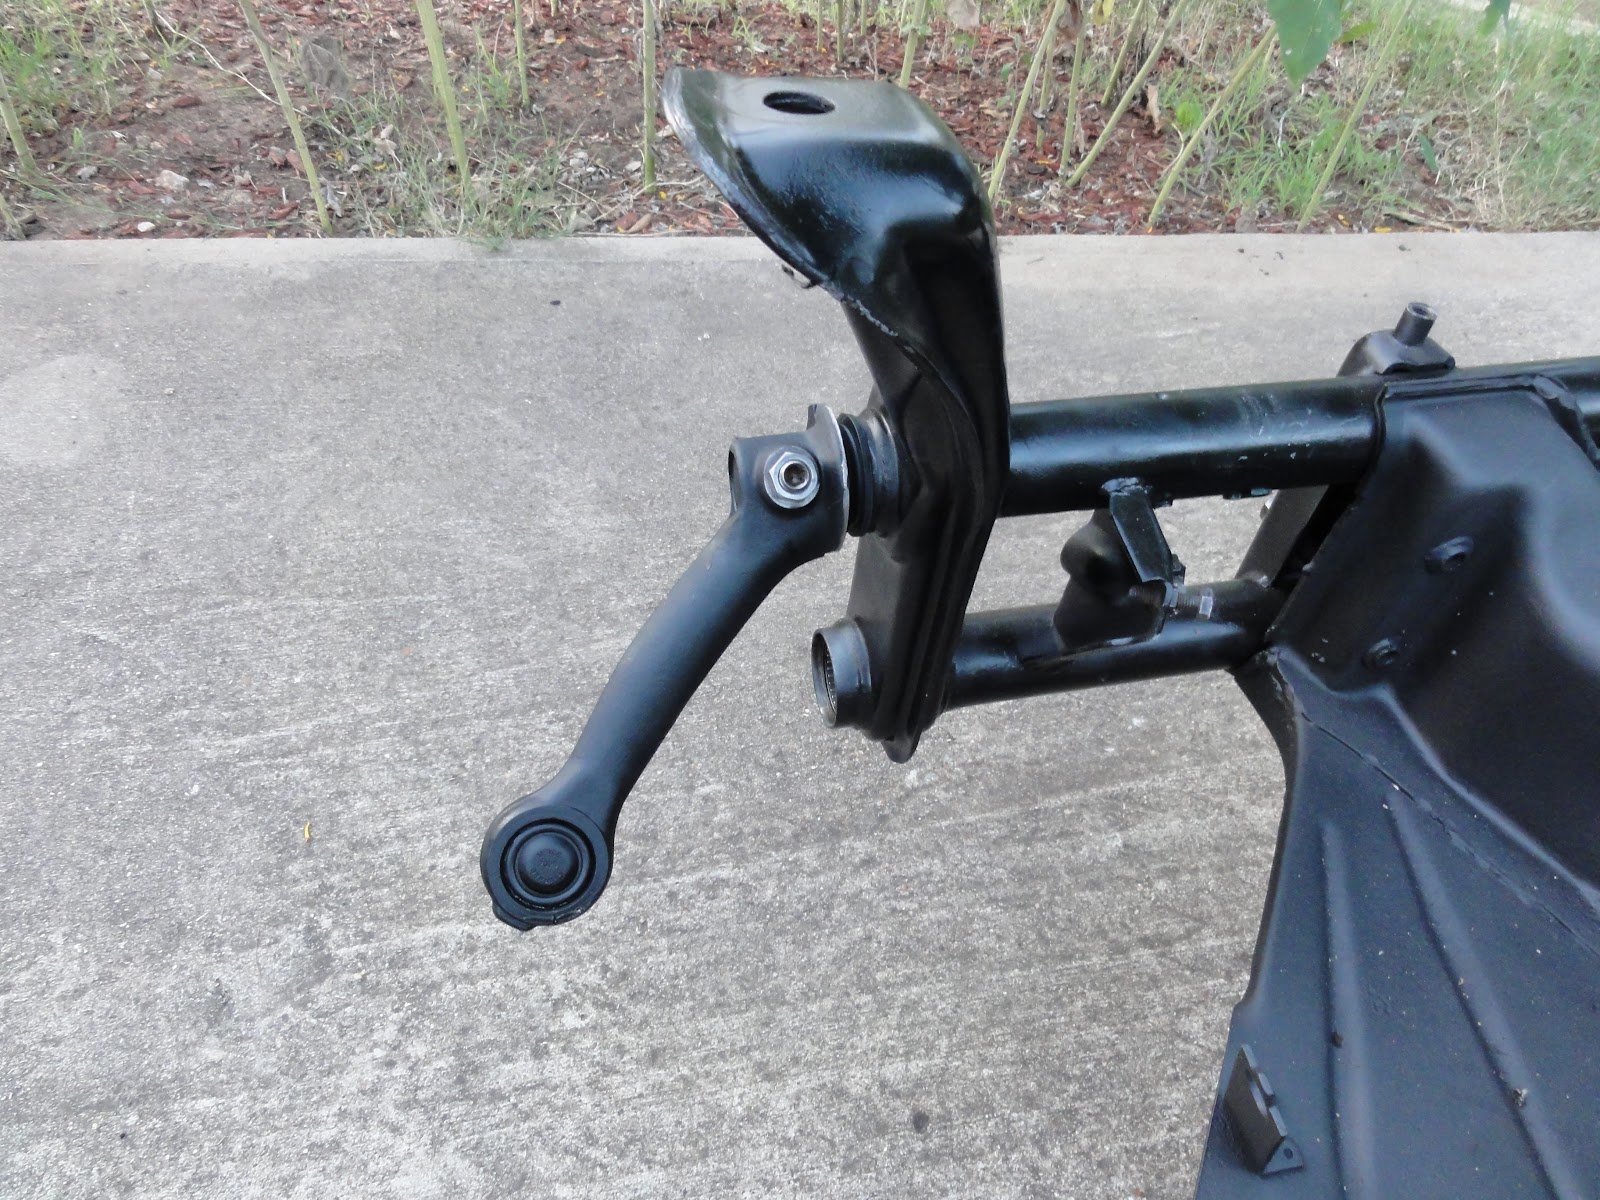
| The first piece back on... |
 |
| ...is the top torsion arm. |
Of course a claim like that requires some qualification, since it wouldn't be accurate to say that I put the whole front end back together. Rather, I can say that I managed to assemble what I have been calling the 'heavy metal'--the front beam, with it's torsion springs, arms, ball joints, steering box and tie rods. All these parts form the bouncy parallelogram that is the front suspension, and many of them required more than just a simple buff and paint. I had the ball joints pressed into the torsion arms a couple of weeks ago, so by now, all they needed was some flat black paint.
 |
| The spindles need to be buffed... |
 |
| ...but they cleaned up nicely |
The spindles, now free of the ball joints that had held them to the torsion arms for so long, were ready, having been buffed and painted the previous week. It was a bit tricky mounting them, but with a little upward force on the top arm, they just fit the way it was supposed to.
 |
| New ball joints are installed... |
 |
| ...with the spindle between them. |
The lower torsion spring set was shot, so I went over to Austin Veedub for a replacement set. Knowing the terminology now is helpful, since I was able to ask for the right part and the guy even knew what I was looking for. He set a guy to work on it while I waited. Soon I heard the sound of rhythmic banging coming from the spot where the guy was supposed to be removing my spring set, and I knew that couldn't be good.
Hmmm. No banging should be required to remove those springs.
Just remove a couple of set-screws and it should just slide right out. Not sure if the banging was actually related to my quest, I took Loki out for a drink of water and when I returned, the parts guy had a set of torsion springs out on the counter.
The wrong springs.
I knew this right away and told the guy so. He looked chagrinned but said "I knew it! The Boss just came by and told me that these were what you needed, but I didn't think so." "Well," I said, "You were right. Now where's your guy working on that set?" He took me into the back where I found a young mechanic bent over the front end of a shell of a bug. A long metal pole was sticking out of one end of the lower torsion tube and barely an inch of the springs had emerged from the other side. I looked at it and could see that the tube itself was bent, and that was what was preventing the springs from coming out. I told him that the top and bottom springs were identical and that it didn't matter where my set came from, so he quickly loosened the set screws and in less than a minute I was headed to the cashier with my greasy prize.
I felt like a head-hunter emerging from the jungle with my trophy. Back home, I slid the torsion spring set into the tube as soon as I got it out of the truck. This was the last, greasiest and dirtiest job I'll have to do for some time. I expect that I'll face some similarly tough moments in the body rebuild, but this part really symbolized the baseline for this reconstruction.
 |
| The steering box needs help... |
 |
| Fresh grease, please. |
After those greasy springs went in, it was time for another semi-dirty job required prior to this rebuild: cleaning and rebuilding the steering box. When power-washing the frame a few months back, I inadvertently blew the plastic plugs out of the steering box cover and forced a bunch of water into the box itself, where water is definitely
not supposed to be.
 |
| New tie rod ends, too. |
 |
| Tie rods connected to steering |
I thought perhaps I had ruined it because the action soon got a bit stiff, but in fact it turns out to be a fairly durable component with a couple of heavy metal gears inside that do not rust easily. I simply had to remove the top plate, clean out the hydrolyzed gunk and refill it with gear oil. A quick coat of paint and it was ready to reinstall. I was careful not to disturb the blocking bolts that limit the reach of the Pitman arm, so it was a simple matter of mounting the box so it hit the two bolts at the end of its reach and bolting it into place.
Once the steering box was back on the front beam, it was time for the rest of the fun, clean work. This is what I had been looking forward to for so long. And, it went exactly as I'd hoped.
 |
| The long tie rod and new end. |
 |
| Steering damper, too. |
Slowly I was able to fit all the parts back together, carefully buffing and cleaning up each bolt, bracket and nut as I went along. Some of the parts, like the tie rods, had already been sanded and painted, and just had to install the brand new ends. I measured the old tie-rods carefully so when I fitted them back in, they dropped in perfectly!
 |
| A new front end is installed! |
The best part of this whole exercise was this, the final assembly. I collected all the clean, painted and new pieces and proceeded to put it back together like a big metal model. After assembling countless models with their decorative little tie-rods and wheel spindles, it was a delight to put together something massive and real.
I love it when that happens.
Next: Back to the back...


No comments:
Post a Comment