When I bought this car, I had no idea if the engine was any good.
 |
| The engine prior to tear down |
It looked ok, and when I gave it a test--turning it over with a wrench--it was not frozen, which I took as a good sign. Another good sign was the absence of oil, either on the bottom of the engine, or from any the various places where leaks typically develop, like the oil pump and front seal. I made the decision early on not to buy a rebuilt engine for the Ghia, or to even rebuild the engine in it, for a couple of reasons.
First of all, replacing the engine with a 'brand new' completely rebuilt one would cost me around $2K. While this would eliminate any question of how the Ghia will run, it is also too expensive to consider as a reasonable option. After all, I only paid $1,300 for the car itself!
 |
| The clutch came off first |
Nor did I want to rebuild the engine, as this is a most difficult and time consuming task. It's not without it's rewards, which I know because I have rebuilt a VW engine once before. It took me several months and even though I was successful (perhaps
because) I didn't want to tackle this job unless I absolutely had to.
Besides, while it doesn't cost nearly as much, rebuilding an engine can be a fairly expensive task if a lot of parts need to be replaced. So, not eager to perform the work, and not knowing how much it would cost, I elected to forgo the whole thing and simply put the old engine back into the new car. I figured that if it didn't work, it's a relatively simple matter to remove the engine and replace it if I absolutely
have to do it.
 |
| The clutch plate and disc |
Of course, I did not plan on simply bolting the old engine onto the transmission without cleaning it up a bit, so as soon as I finished with cleaning up the heads, I turned to the engine to see what I could do to make it look and work better without actually cracking it open.
 |
| Clutch disc looks good |
The first thing to come off was the clutch. Looking at the clutch plate from the outside, the absence of dirt and grime suggested to me that the clutch disc inside was going to be in pretty good shape, and fortunately, this proved to be the case. In fact, I was encouraged because the lack of wear on the disc suggested that it was a replacement, and that the car had not been driven a great deal. This in turn made me think that then engine was likely to be in pretty good shape.
 |
| New cylinders and pistons |
 |
| These cylinders are shot |
The cylinders, however, told another story. Although they did not appear to be leaking gases at either the base or the heads, these unpainted and untreated steel pieces were covered with rust. On a VW engine, the cylinders are designed to be easily replaceable and they are relatively inexpensive, so I decided to do just that. A replacement set of cylinders with pistons and and wrist pins was just under $100.
 |
| The case gets cleaned up... |
 |
| ...and painted |
The engine case was in need of a good cleaning, so after removing the cylinders, I spent a few hours going over it with a wire brush and some solvent. Then I masked off the cylinder ports and gave the case a quick coat of black paint.
 |
| Pistons and wrist pins are first |
 |
| The wrinkle band ring compressor |
Next it was time to mount the new cylinders and pistons. This required the use of two special tools, one of which I had to order. I already have a set of locking ring pliers, but needed a wrinkle band ring compressor to slide the pistons into the cylinders.
 |
| Compressor in action |
 |
| It worked perfectly |
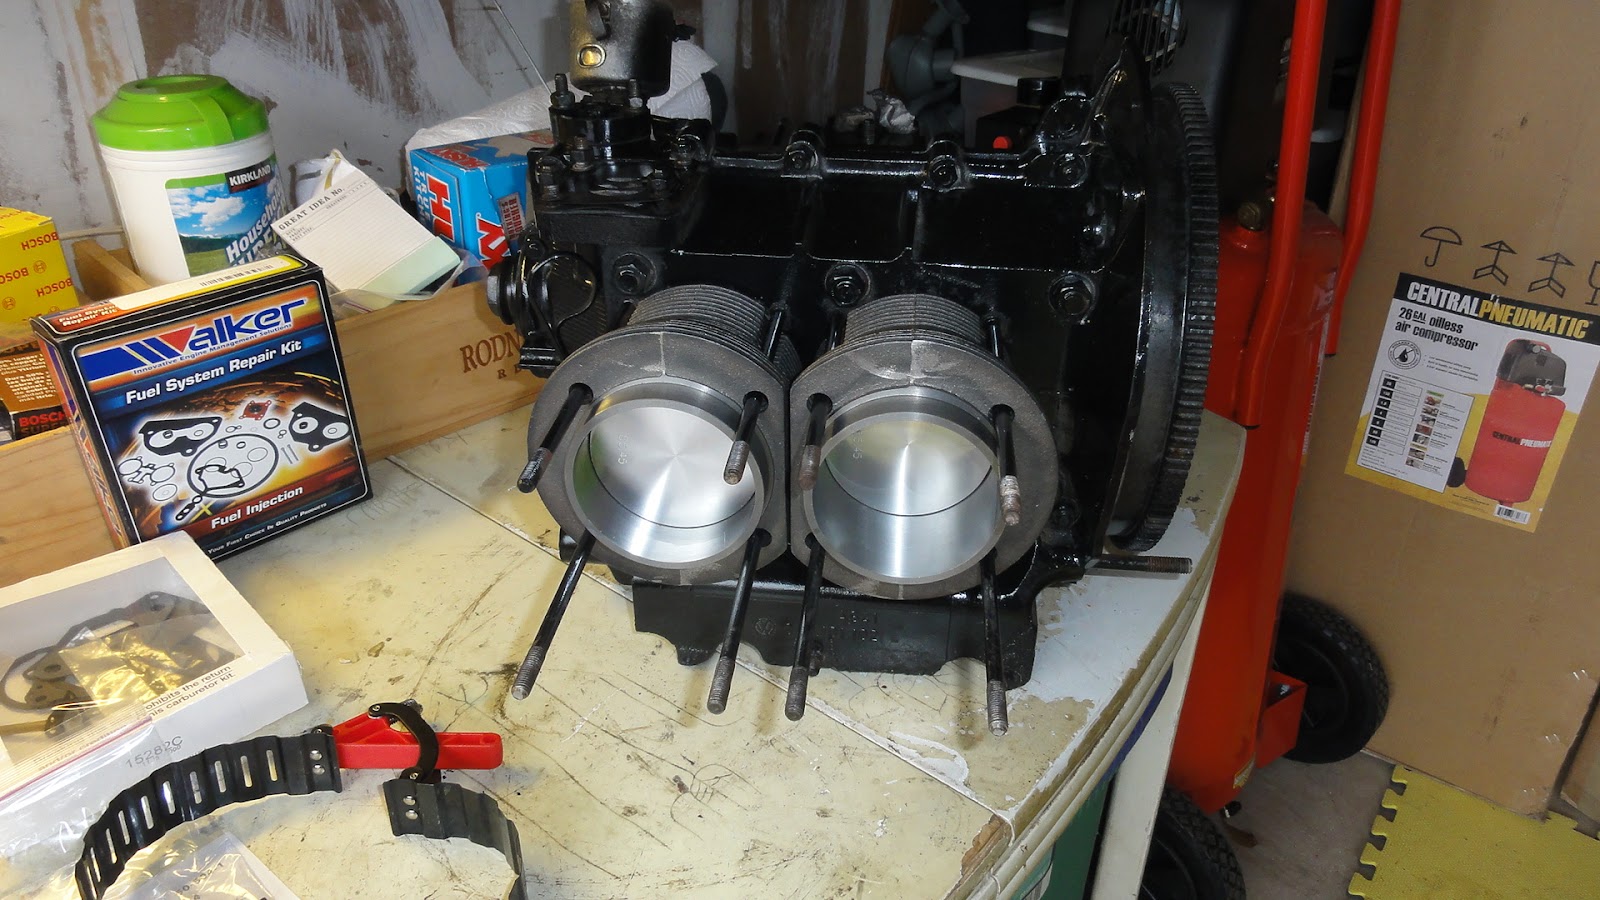
Auto parts stores do not sell this tool so I had to order it online. With the pistons mounted on the connecting rods, I used the ring compressor and mounted all four cylinders. It was starting to look good. With a few more pieces, like the heads, pushrods and tubes, it would really start to look like an engine.
 |
| Ready for the heads |
 |
| Both cylinders are on |
I finished mounting all the cylinders and stepped back to admire my work. I spun the clean and painted case around on the table a couple of times and decided to call it a day. But before leaving, I somehow got the idea to check the fuel pump. I'd taken the pump itself off the block a long time ago, leaving the plastic fuel pump pushrod guide in place to keep stuff from falling into the engine through the open hole. Now that I had the beginnings of an engine block, the guide had done it's job, so I figured I'd pull it out to have a look at it.
 |
| Fuel pump guide, obviously broken |
 |
| Disaster |
I could not have been more disappointed when I pulled it out. Instead of a whole guide, what I removed was broken, missing a fairly large piece at the bottom. Whether it broke as I removed it (unlikely) or had been broken the whole time, I will never know. But it doesn't matter. I knew even as I saw the broken piece that there was only one outcome. I would have to take the engine case apart, find the debris and rebuild it from the crankshaft up.
 |
| That piece? In here... |
Now, this is not the end of the world. It's not even all that agonizing, since I still believe that with the new pistons and cylinders, this engine will run perfectly. By tearing it down, I'll have an opportunity to be certain about the capability of this engine. If the bearings (or anything else inside) are shot, well, then I'll know it's time to buy a new engine.
However, this is going to delay the completion of the project by a few weeks, to say the least.
Next: What's inside.


No comments:
Post a Comment