Tuesday, March 1, 2011

Front End Follies and Engine Removal


Much to the disappointment of at least one Reader, there will be no further mention of ball-banging in this journal, as it appears that the author is, sadly, incapable of said banging.

Close observation and careful reading on the internet (both of which are considered by experts to be critical auto mechanical skills) have revealed that the task is one best left to professionals, who will apparently not bang, but gently press the ball-joints out of their sockets in the torsion arms, at a cost of $35 per socket (or ball-joint, depending on your point of view).

To this end, yesterday I called Austin VeeDub--the local VW scrapyard/spare parts/machine shop--and they do this all the time, so instead of ordering the ball-joints online and trying to put them in myself, I'll just pay for the service and the parts and let them do it all in one go.  I'll just take in the old and come back for the new.

Pulling all these parts off has been relatively easy till now.  This is the first thing that I simply can't do here in the driveway.  There will be other things, like having the rotors turned and polished.  I had to pull them off first, of course, before I could get to the ball joints and torsion arms, and they look a bit worse than they really are.  They are a bit rough and have a bit of rust around the edges and on the back, but that can be machined/cleaned off with relative ease.

The piece I was after was a bushing.  This bit of plastic (formerly rubber) is what keeps the torsion arm from scraping against the front beam tube, and it is the most difficult and 'deepest' part I will have to replace before I can begin to rebuild.  Or so I thought.  Pulling off the lower torsion arms I discovered that the spring steel torsion 'leaves' that are inside the front beam tubes were rusted and broken.  Somehow water had made it's way into the tube and reduced the grease inside to a useless gray cream.  Rust and torque did the rest.  I pulled out the whole set of torsion leaves and threw away the broken ones.  The call to Austin VeeDub also revealed that they had sets of these leaves in the used parts department.  All I have to do is come down and find a set that fits.  Interestingly, when I called Austin VeeDub, the used parts manager is the same guy that was working there back when I rebuilt my other two VW's!  I don't know if he'll remember me, but I sure remember him.  he helped me solve more problems than anyone besides John Muir (cf. How to Keep Your Volkswagen Alive).

After pulling apart the front beam as much as possible without actually pulling it off the frame (no need to do that yet, as I'd just have to store it somewhere) it was time to remove the steering box.  I hadn't planned on this, but discovered that after the power washing I had gotten some water in the box and it was beginning to get stiff.  So, I pulled it off and as I turned it over, the remainder of the oil in the case poured out all over my leg.  Three days and three showers later, I think the smell is gone, whew!

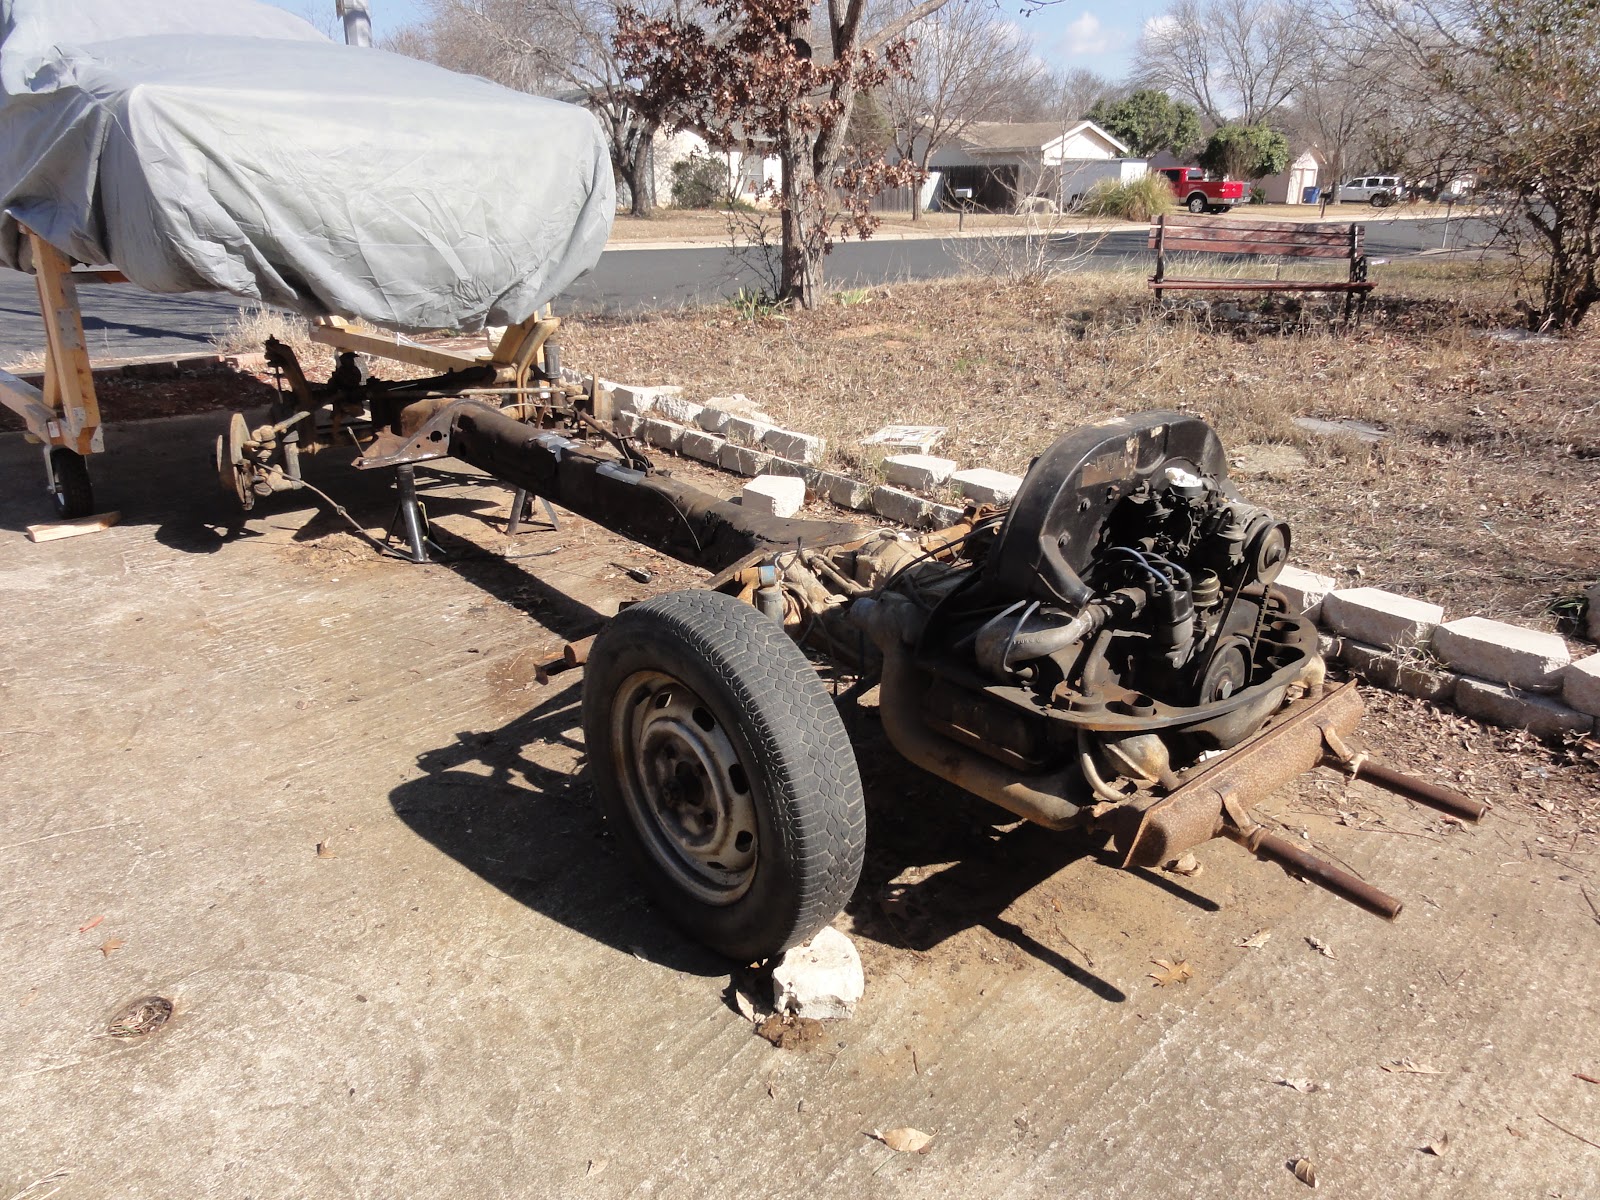
Next it was time to pull off the engine.  This is necessary at this point only to restore some balance to the frame now sitting up on jack stands.  After pulling off all the front heavy metal, the whole thing was beginning to get back heavy, which meant I could tip it up with barely a finger.  One more part off and the it would just sit up on it's butt.  Richard suggested putting some rocks on the front end to hold it down, but I opted to pull the engine instead.

Pulling the engine is not a difficult job when the body is on the car, but with it off, it's amazingly easy.  There are just four bolts holding it to the transmission case, and I had these out in just a couple of minutes.  I bought a cheap little dolly at the tool store and put it under the engine along with a couple of scissor jacks.  Then when the bolts were out, I just lowered it down and set in on the little dolly and voila!  Now I have the engine off but I don't have to move it very far, which is nice.  I just leave it under the trap like before.
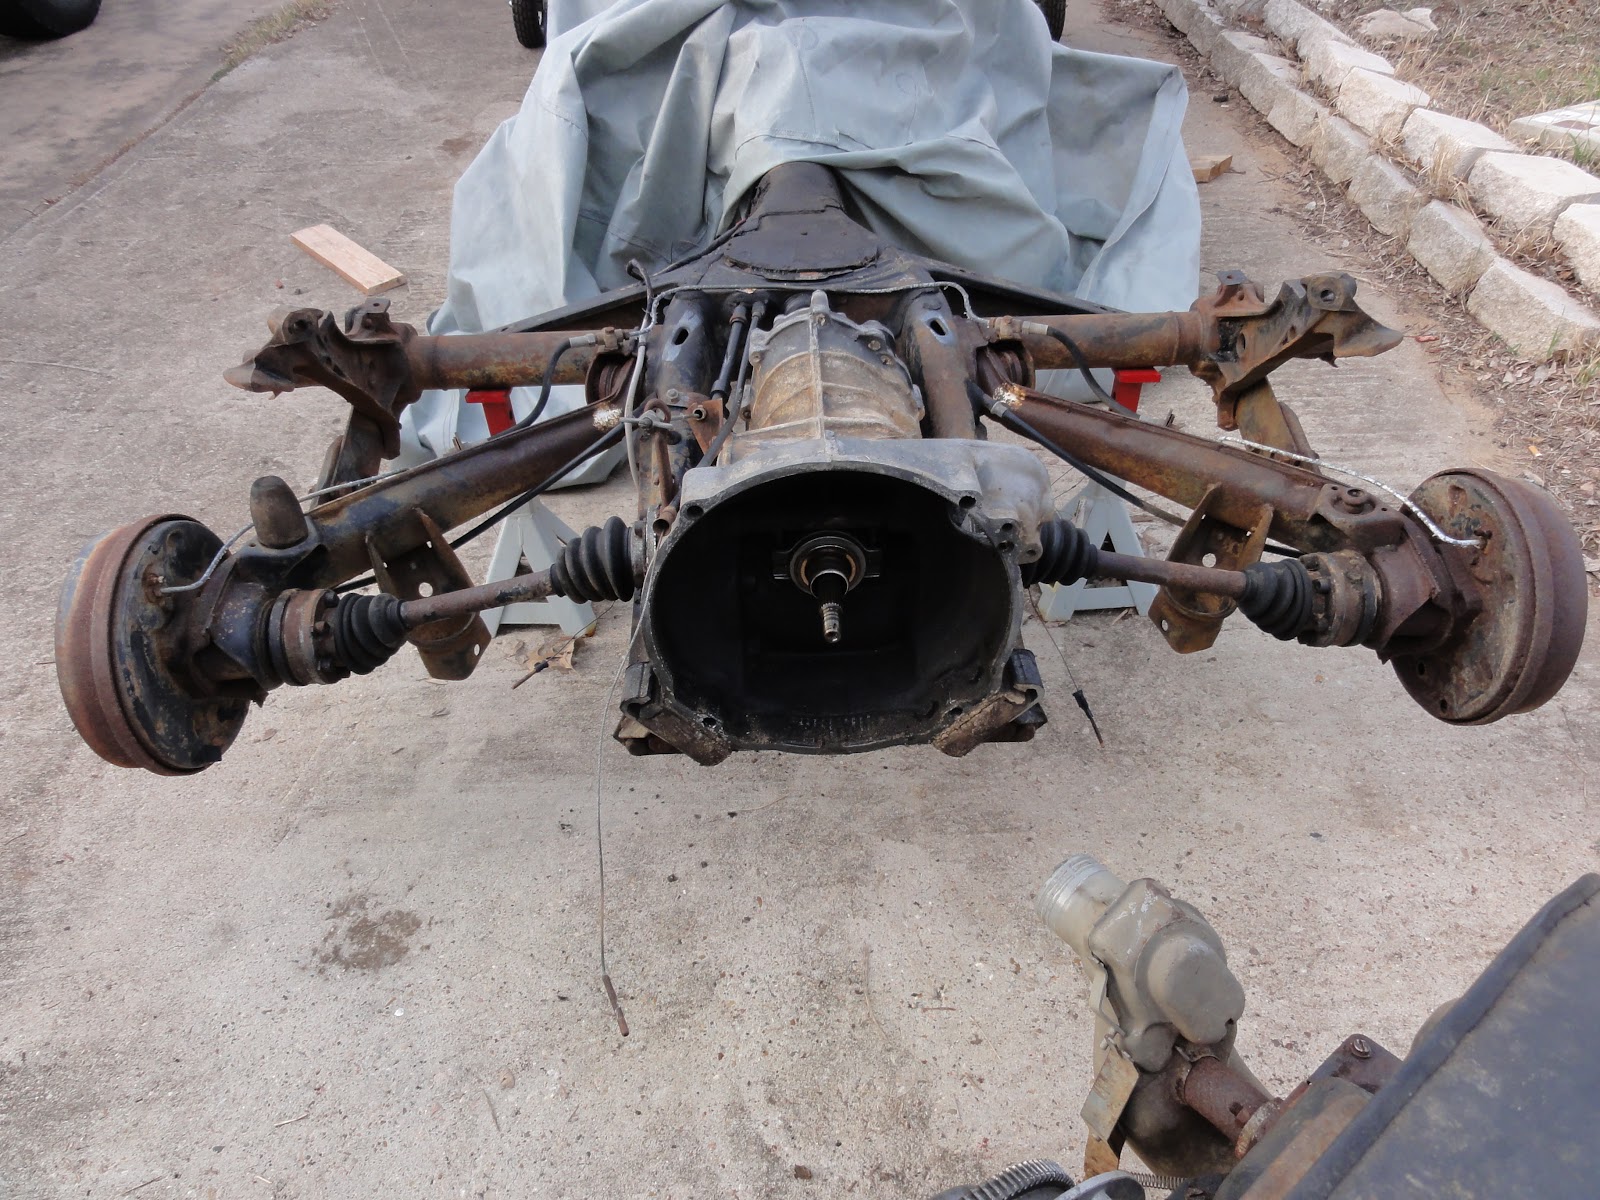
It looks like the clutch is is good shape, which reinforces my belief that this car didn't get driven very much after the rebuilt engine was put in.  Closer inspection of the transmission though, makes me think it was the original on the car, and a likely candidate for replacement.  Leaks from the seals around the driveshafts are good indicators that it's time to replace rather than refurbish this part.  After all, it's way too complicated and just cheap enough that I don't have to bother.


Next up:  After transmission removal, the rebuild begins with the front beam.

Monday, February 14, 2011

Heavy Metal

 I didn't get to work on the Ghia yesterday because I had to drive to Dallas on business, but it would have been a great day to turn a corner, so to speak, in the process.  As it is, I was able to get after some of the front suspension the week before, when the temperature dropped and just enough snow fell that we got a day off.  Cold though it was, it was still a bright sunshiney day, and I went out to bust some knuckles on some cold and heavy steel.

As it turns out, I didn't manage to hurt myself in spite of the cold and the repeated use of a hammer to remove the tie rod ends and the ball joints.  Because they have to literally support all the steel I've already managed to strip off the car, the suspension parts are the heaviest and hardest to remove of all the pieces on the frame, including the engine.  I used a special tool called a 'pickle fork' to remove the tie rod ends, driving the wedge-like steel fork into the gap between the stuck tie-rod end and the pitman arm (on the steering box) and the wheel spindles.  It seemed like mayhem, but after a couple of whacks, they came right out.

I wish the same could be said for the ball joints.  The top joints fell out of their mountings with a couple of hard whacks with the hammer, but the bottom joints are in too fast to simply bang out, especially on a cold day.  I've been reading that the way to get them out is to heat the torsion arm mounts until they are a dull red, then bang 'em out with the hammer.  It doesn't sound very precise, but it might be easier and cheaper than buying a special tool.
Once I removed the brake rotors I had my first look at the front wheel bearings, which looked perfect.  A little clean and some new grease and it will work perfectly.  I am not so sure about the rotors, which are a bit rusty on the edges but otherwise smooth across the braking surface.  They aren't expensive to replace, but I am working on the principle that anything not broken or worn out can be cleaned up and put back on the car.  It's both economical and respectful of the mechanics--if it ain't broke, I am not going to fix it.  Besides, there's plenty of broken and rusty stuff that I can replace!  In any case, I am finally down to the most basic element.  Once I replace the two bushings on the torsion bar arms, I'll be on my way back up.

Next: Ball joint banging

Wednesday, February 2, 2011

Power Wash

Last Sunday was a real milestone in this project.  It was a beautiful unseasonably warm day, just perfect for getting out and cleaning my freshly stripped down chassis with a power-washer.  First, I removed the wheels and put the frame up on jackstands.  Next, I pulled off the brake calipers on the front and the shock absorbers from both front and back.

Then, after covering the engine with a plastic bag, it was time to get down and dirty.

And hoo boy, was it dirty!  Fortunately, it was relatively easy to clean.  Although there was a lot of dirt built up in places where bits of grease had served as magnets for crud, these bits blew off easily.  In places where I thought that rust had invaded the frame I discovered to my surprise that the rust was only superficial, and in many places with was just a sort of patina that just washed off.

The engine and transmission seem to be in pretty good shape.  After blowing all the built up dirt off the tranny it looked better than I had hoped.  The engine, which I know to be pretty good from my cursory inspection of the heads, looked even better when washed, so I have every reason to be hopeful there.  I will pull it off to inspect the clutch but I don't plan to replace or even work on the engine much.

For now, I've finally reach a point that looks like the bottom.  Look at that shiny toy!

From here, the refurbishment begins.


Thursday, January 27, 2011

Down to the Frame at Last

Bolting it to the dolly
Me, Steve, Dan, Tom, Richard, Chis & Henry
Three weeks ago we lifted the body off the frame.  I have to say it went much smoother than I imagined it might.  My seven helpers, Dan, Richard, Henry, Chris, Steve, Tom and Valery and I lifted it off in just two tries.  The only thing I forgot to disconnect was the speedometer cable so that's why we had to lift it twice.  No matter, the muscle was sufficient to the task, as was the giant wooden dolly that I created from a picture on the internet.  It worked, far better than I expected.

Rotten floor pans
Cutting out the rust
Two weekends ago I cut the one of the rusty floor panels off the frame.  It was much easier than I expected, mostly because whoever welded the last set of floor pans in was either so lazy or unskilled that only half the pan was actually welded and that was shitty, to say the least.  You can read about some of the experience in my account (Tools Make the Man) of using the cutting tool in my journal.

Passenger side is next
Both pans are out
The second floor pan came off the frame last weekend, and the story was much same.  I can only hope that whoever cuts the body panels out the next time will have slightly higher regard for my welds than I do for the quality of the previous owner's work on this car.  They get some points for trying, I guess.  In the end, it's a fortunate fail for me.  The frame is free of rotten sheet metal at last.

Off to the scrap heap
Ready for teardown
Now, I can finally attack the frame, suspension, tires, transmission and engine.  No small list, I know, but consider this.  My plan is not to restore but to refurbish this car.  I want to get it running and actually drive it, so my task of cleaning and replacing worn parts will begin this week.

Next week I will remove the wheels and tires, put the remaining frame up on jack stands and give it a good power wash.  Next to a sand-blasting this is the best way to really get down to the bare metal that I can think of.  It will be easier than using chemicals or hand-grinding, to be sure.

Then, it will be time to tackle the front suspension.  I love this work.

Monday, January 3, 2011

Liftoff!

Body Braces

The doors are off
Into storage for a while
After spending at least six weeks--or roughly half of the time that I have had the Ghia--designing and building a dolly to hold the body separate from the chassis while I work on the two halves in essentially the same space in my driveway, the day for the actually removing the body is getting close.

While building the wooden dolly basically turned me into a carpenter for a month or more, I've really been building up the urge to bang around on some metal.  And, although the last step in the process involved metal, it was not 'good' metal (of the rusty and/or automotive type) that had my attention, but a few strategically placed lengths of angle-iron to brace the body and keep it from collapsing like a fortune cookie when it is lifted up off the frame without the doors.

Bolted to the body
Steel angle iron braces
Of course, I first had to remove the doors, which proved to be less difficult than I imagined, but not so easy as it ought to have been.  This was not because the the big bolts holding the doors had become a little rusty (which they had), but because a tricky little hinge pin hidden inside the door required more finesse than force requiring me to think rather than simply wrench and remove.  With Richard's patient help and few brain cells later, I had the doors off and the car ready for the braces.
Ready for liftoff
The frame locks it together
I had originally thought I would have to weld in these braces, but fortunately after the doors came out I found a couple of perfectly placed openings in the body both fore and aft that permitted me to bolt them in instead of welding.

Eight bolts later, we're braced for liftoff.