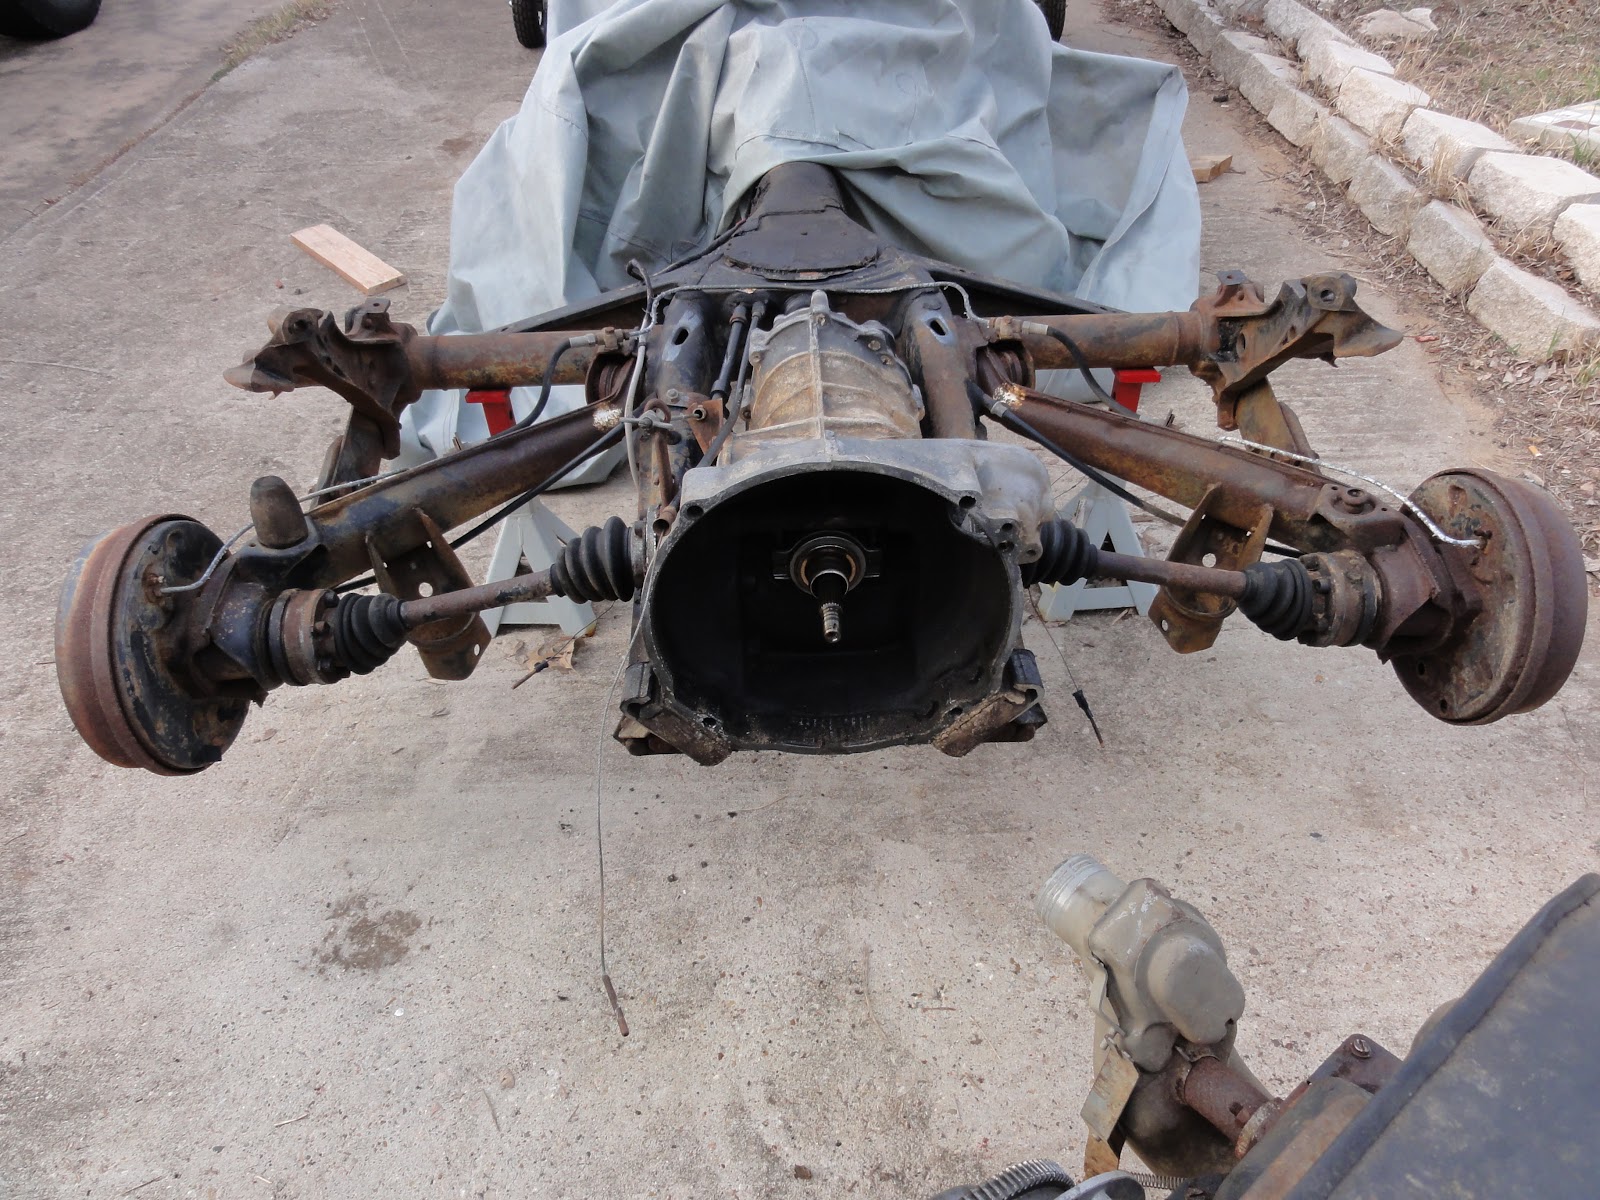
I'm stuck.

It's not a big problem, really. But it is enough to have got me stuck in what Robert Pirsig, author of
Zen and the Art of Motorcycle Maintenance called a "gumption trap." This is a place where, for a reason often very, very small, an entire project grinds to a halt because the driving desire behind the project--the gumption--is lost.
A gumption trap starts with something simple that fails or doesn't work the way it is supposed to. In my case, it's a stuck nut. I know, I know, that sounds like a perfect description of yours truly.
In this case, the nut I'm talking about--the one that has me figuratively stuck because it is literally stuck--is a rather large steel one. To be precise, it is a 36mm nut, and it holds the brake assembly--drum, brakes and backing plate--to the rear driveaxle. There are two of these nuts, one on each side of the car. They are--quite naturally, given the job that they do (holding the wheels on)--torqued down very, very tight. I got one off, no problem. But the other one is, well, stuck.


I don't know how many foot-pounds it takes to break this nut exactly, nor do I really care, but I do know it's one
helluva lot. I know (now) that you are supposed to break these nuts while the car is not merely still assembled, but also while it is still resting on the ground. In other words, this should have been one of the first things I did, like six months ago.
This nut is stuck because the amount of force required to break it free is no more than two or three pounds less than the entire weight of the car. Now that it's stripped down to the frame, I just can't bring enough force to bear. My puny little 140 pounds of dead weight is just not enough. Even the breaker bar that extends my reach by a foot and a half and doubles my leverage is insufficient to the task.
So, there you go. I'm stuck. I've tried various solutions, but so far, nothing's worked. In fact, so many things haven't worked that I can say with some certainty: I am stuck. I look at it. I think about it. Nothing comes to mind. Yet.

Actually, being stuck isn't all bad. In fact, it may be the very reason why I've undertaken this project in the first place. In Zen, Pirsig used the idea of 'stuckness' as a pivotal point for his inquiry into the nature of Reality. He observed that it's not until we are stuck--that is, in a critical situation without an obvious solution--that we become momentarily aware of Reality itself.
Reality appears to us only for that moment, however. As soon as we find our solution, we lose that direct contact with it, and find ourselves dealing instead with the duality that masquerades as the world. We turn from the light and again see only the shadows.
Fear not, I'm in no danger of losing touch with Reality. Though I am staring at the light, I'm still well and truly stuck on this damn nut.

The exasperating aspect of this situation is the fact that this is a double-edged sword (or wrench, if you will) that I'm holding here. On the one hand, as both Readers know, I love the metal and the grease and the whole taking-things-apart idea that the Ghia project embodies. In a simple world, it'd be easy to explain these impulses as simple boyish desires to have fun tinkering and getting dirty. I don't deny it. To a large extent, that is actually the case.

On the other hand, if it were all too easy (if that nut were to just come rightoff), it'd be no fun either. Ironically, it actually feels good to be stuck. For a while, anyway. It seems that I seek stuckness as a way of finding satisfaction in what I do. It's an integral part of the process and the source of my motivation. Escaping from the gumption trap is truly an exhilarating feeling. But you can't get that feeling without getting stuck, first.
I know, to a casual observer driving down our street on a Sunday afternoon, it might look like I'm just standing over a rusted hulk of a car with a couple of buddies, drinking beer from a green bottle and doing nothing. There's some truth to that.
But that's only part of the story.
Inside that stereotypical South Austin driveway mechanic is a true philosophical type, pondering the infinite mysteries of a stuck bolt in much the same way Socrates considered the nature of Love during one of those infamous all night drinking parties he had with his buddies.
Ok, ok, so I'm no Socrates and this is no
Symposium. But then, could he, would he, have figured out how to break this damn nut?

 With the trailing arms out and off to the machine shop to receive their new bushings, it was time to pull out the transmission. I like the British term for this piece better--gearbox--because it sounds racier I guess, but by either name it had to come off the frame for cleaning and inspection.
 This is not a difficult job--unless the body and engine are still attached, and even then it's fairly straightforward. It's attached in just three places, so it was a simple matter to unbolt it and lift it off the frame. I set up a hydraulic jack underneath just in case, but as it's made of aluminum, after the bolts were out and the shift rod was detached, I was able to simply pull it out and set it off the the side.
 The gearbox is dirty but looks to be in good shape. Although it had a fair amount of crud built up, particularly around the driveaxle connections, it doesn't appear to have been leaking, at least not too much. The layer of crud is either a bit of grease that oozed from the front seal and has been collecting dirt for thirty-seven years or is just mud and dirt built up in those places you expect it to. The 'guts' of the gearbox are relatively hard to wear out, so when I check the fluid if it's free of contaminants (especially metal) I will assume that it is ok and just clean it up before putting it back in. Of course, if there are metal flakes in the fluid, it will be time for a trip to the junkyard.
 Speaking of the junkyard, I took the trailing arms in to Austin V-Dub last week to have the bushings replaced and it was a lot more expensive than I thought it would be. The guy just called to tell me that they are ready and the total came to over $650. Now, to be fair, $250 of that is actually for the front ball joints, which are being replaced as well. Although the $400 for the rear trailing arm bushings is a lot of money, I really don't have any choice. For one thing, the bushings are no longer common, and of course replacing them is no longer a routine machine shop chore. Fortunately the guy at Austin V-Dub is older and knows what he is doing, which is--of course--a lot more than I can say for myself.
 While waiting to save up the money to get my heavy metal parts our of hock next week, I turned my attention to the front beam. Although I had not intended to pull this off originally, after the work I've done on the rear it seemed like the consistent--if not easiest--thing to do was to pull it off, clean and repaint it. Just four bolts hold it on, and in just a few minutes my decision proved to be worth it, for the rust and grime I discovered was considerable and I'll feel a lot better about it knowing it's clean and tidy under there, even if no one will ever see it except for me. This task also meant that my dirty days are not over, as the broken and rusted lower torsion springs left quite a gritty mess inside the tube. That stuff had to come out, and all the surface grime and rust had to be whisked off the frame with the wire wheel. Then I primed and painted the beam, but since I didn't clean up the mounting bracket on the frame, I will have to wait to put it back on this weekend.